1. 구글 reCAPTHCA 관리 페이지에서 사이트 등록
https://www.google.com/recaptcha/admin/create
로그인 - Google 계정
하나의 계정으로 모든 Google 서비스를 Google 계정으로 로그인
accounts.google.com

2. 로컬에서 테스트 할 경우, localhost와 127.0.0.1을 도메인으로 등록하고, 실서버에서 사용할 경우 해당 도메인을 등록한다
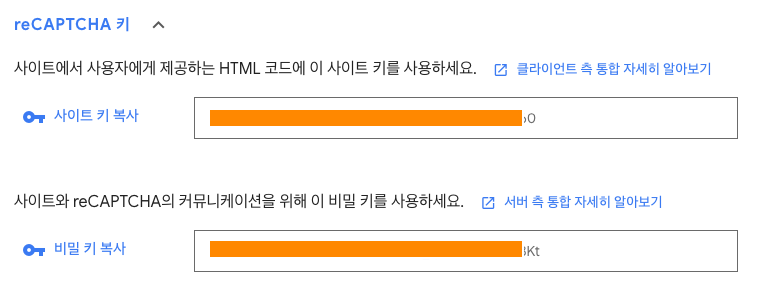
3. 등록 후 발급된 사이트키와 비밀키를 저장한다
4. (gradle 기준) build.gradle 파일에 아래 의존성 추가
    implementation 'net.tanesha.recaptcha4j:recaptcha4j:0.0.7'
    implementation 'javax.json:javax.json-api:1.1.4'
    implementation 'org.glassfish:javax.json:1.1.4'
5. (properties 파일 혹은) yml 파일에 사이트 키와 비밀키를 저장한다

6. yml 파일에 저장한 값을 불러오는 컴포넌트 파일 작성
import lombok.Data;
import org.springframework.boot.context.properties.ConfigurationProperties;
import org.springframework.stereotype.Component;

@Data
@Component
@ConfigurationProperties(prefix = "google.recaptcha.key")
public class RecaptchaConfig {
    private String site;
    private String secret;
    private String url;
}
7. g-recaptcha-response 값의 유효성 검사 ( form 형식으로 제출 할 때, reCAPTCHA의 결과값이 g-recaptcha-response에 담겨서 옴)
# Controller
import lombok.RequiredArgsConstructor;
import org.springframework.web.bind.annotation.PostMapping;
import org.springframework.web.bind.annotation.RequestMapping;
import org.springframework.web.bind.annotation.ResponseBody;
import org.springframework.web.bind.annotation.RestController;

import javax.servlet.http.HttpServletRequest;

@RestController
@RequestMapping("/recaptcha")
@RequiredArgsConstructor
public class RecaptchaApiController {
    private final RecaptchaService recaptchaService;


    @ResponseBody
    @PostMapping("/validate")
    public boolean validRecaptcha(HttpServletRequest request) {
        String recaptcha = request.getParameter("g-recaptcha-response");
        return recaptchaService.verifyRecaptcha(recaptcha);
    }
}
# Service
import lombok.RequiredArgsConstructor;
import org.springframework.stereotype.Service;

import javax.json.Json;
import javax.json.JsonObject;
import javax.json.JsonReader;
import javax.net.ssl.HttpsURLConnection;
import java.io.BufferedReader;
import java.io.DataOutputStream;
import java.io.InputStreamReader;
import java.io.StringReader;
import java.net.URL;

@Service
@RequiredArgsConstructor
public class RecaptchaService {

    final RecaptchaConfig recaptchaConfig;

    public boolean verifyRecaptcha(String recaptcha) {
        String secretKey = recaptchaConfig.getSecret();
        String url = recaptchaConfig.getUrl();
        try {
            URL obj = new URL(url);
            HttpsURLConnection con = (HttpsURLConnection) obj.openConnection();
            con.setRequestMethod("POST");

            String postParams = "secret=" + secretKey + "&response=" + recaptcha;
            con.setDoOutput(true);

            DataOutputStream wr = new DataOutputStream(con.getOutputStream());
            wr.writeBytes(postParams);
            wr.flush();
            wr.close();

            BufferedReader in = new BufferedReader(new InputStreamReader(con.getInputStream()));
            String inputLine;
            StringBuffer response = new StringBuffer();

            while ((inputLine = in.readLine()) != null) {
                response.append(inputLine);
            }
            in.close();

            JsonReader jsonReader = Json.createReader(new StringReader(response.toString()));
            JsonObject jsonObject = jsonReader.readObject();
            jsonReader.close();
            return jsonObject.getBoolean("success"); //최종 Return 값 : true or false

        } catch (Exception e) {
            e.printStackTrace();
            return false;
        }
    }
}
8. HTML 부분에 리캡차 추가하기
# HTML
<form id="recaptcha-form">
  <div id="recaptcha"
       class="g-recaptcha"
       data-callback="recaptchaCallback"
       data-expired-callback="expiredCallback"
       th:attr="data-sitekey=${reCaptchaSettings.site}">
  </div>
  <a id="submit-btn" href="#" class="btn btn-primary disabled">Submit</a>
</form>
# Javascript
    <script src="https://www.google.com/recaptcha/api.js" async defer></script>
    <script type="text/javascript">
      // 화면 시작 시 g-recaptcha 생성
      function recaptchaCallback() {
        return new Promise(function (resolve, reject) {
          if (grecaptcha.getResponse() !== "") {
            let _a = $.ajax({
              url: "/recaptcha/validate",
              type: "post",
              contentType: "application/x-www-form-urlencoded",
              data: $("#recaptcha-form").serialize(),
              dataType: "text",
              success: function(data, status, request) {
                if(data) {
                  $('#submit-btn').removeClass('disabled');
                } else {
                  $('#submit-btn').addClass('disabled');
                }
              },
              error :function(request, status, error) {
              }
            });
          }
        });
      }

      function expiredCallback() {
        $('#submit-btn').addClass('disabled');
      }

    </script>
reCaptchaSettings 변수는, 모델에 담아서 전달했습니다.
    @Autowired
    private RecaptchaConfig recaptchaConfig;

    @GetMapping
    public String getList(Model model) {
        model.addAttribute("reCaptchaSettings", recaptchaConfig);
        return "recaptcha/recaptcha";
    }
https://developers.google.com/recaptcha/docs/display
reCAPTCHA v2 | Google Developers
Google is committed to advancing racial equity for Black communities. See how. reCAPTCHA v2 This page explains how to display and customize the reCAPTCHA v2 widget on your webpage. To display the widget, you can either: See Configurations to learn how to c
developers.google.com
<구글 리캡차 v2 , v3 문서 사이트>
': IT > Java' 카테고리의 다른 글
| [Java] 구조체 enum (0) | 2021.04.13 |
|---|---|
| [Java] double형을 int형으로 형변환 (반올림) (0) | 2018.05.04 |